Monday 17 December 2012

Loving My Sticker machine

I'm still having so much fun with my sticker machine.  I just wanted to share a little matchbox project.


I have been burning my Glasshouse White Christmas candle pretty much every night during December.  It smells so Christmasy.  I leave the matches next to it for easy lighting, but a normal Redheads pack is not very attractive, so I covered it.


Two pieces of gift wrapping paper through the sticker machine and then straight onto the matchbox.


That looks better.

Even the tea lights didn't escape a ribbon sticker.


Got to stop putting stickers on everything and go wrap some presents.

To see more Christmas decorating, please visit my new blog DIY Decorator

Friday 14 December 2012

Giant Christmas Wreath

I really like to decorate the front of our house for Christmas, and the big arch window was just crying out for a giant wreath, so I made one.


How To Make a Giant Christmas Wreath

You will need:

  • A dog who chews his moon chair apart leaving only the circular frame or a plastic hula hoop which will be lighter and easier to hang.
  • plain garland - I used 2 x 1.8 metre garlands from Spotlight
  • Ribbon to make a bow
  • Baubles or decorations
  • Battery operated fairy lights


Step one - Wrap the garland around the hoop.  My garland was wired so it stayed in place without the need for glue.  Fan out the branches to cover the frame.
 Step two - Make a bow.  Make a loop, then make two more.  Cut a small length of fabric and fold it around the centre of the loops.  Cut a long length of fabric and fold it in half.  Place it at the back of the bow and staple into place.  You could also glue it in place if you don't want to see the staples.

Step three - Decorate the wreath.  I wrapped 2 x 20 light battery operated fairy lights around the wreath.  Attached some gold baubles I had to the wreath with some green wire, and attached the big red bow to the top.


I really wanted to make a big bow out of red hessian/burlap like one I saw at Pottery Barn, but it seems everybody else had the same idea, and Spotlight was completely sold out.


Step four - Hang the wreath.  This is where a light weight hoola hoop would be better than a heavy metal frame.  I ignored all the instructions on the packet and attached 2 large clear command hooks to my arch window.  The benefit of these is they have clear strips which you can't see through the window.


and voila - a very Christmasy giant wreath.


It looks pretty all lit up at night, but unfortunately I'm not a good enough photographer to capture it for you.  Maybe next year?  Only 11 more sleeps.

To see more Christmas decorating, please visit my new blog DIY Decorator


Wednesday 12 December 2012

Christmas Lanterns


When you spend a lot of time on pinterest, your list of 'Things To Make or Do' becomes quite long, and after seeing pictures of beautiful Christmas lanterns, I knew I needed one ... or two.


 There were plenty of white and silver lanterns in the shops, but I wanted something a little more rustic that would match the colours of my house.  I finally found some white-washed timber lanterns at Eureka Street.  To make them Christmasy, I added fake snow $2 from Overflow, a mini wreath $2 from Overflow, and battery operated Real Safe Candles.


The candles are great.  They look like real candles as they are made from wax but are battery operated LED, so I don't have to worry about leaving real candles burning unattended and the timber lanterns won't catch fire.  Even better, I bought the remote control for them, so I press either the 4 or 8 hour timer and they turn themselves off.  How good is that?  I also used rechargeable batteries.


Here's how they look at night.


Just one thing about candles made of wax.  When you leave them behind glass on a 40 degree Brisbane summer day, they melt!!!!  They are fine in normal temperatures but 40 degrees was just too much.


To see more Christmas decorating, please visit my new blog DIY Decorator

Monday 10 December 2012

How to Make Your Own Stickers

I love stickers.  They are such a quick way to decorate something.  Recently I discovered the Xyron Create A Sticker, and I knew I would have so much fun with it.  I bought the Xyron 250 which makes stickers up to 2.5 inches or 6.4cm wide.  I bought it from Queensland based Crafts Online here.  It's not a sponsored post.  I paid for it.


Basically, you can insert anything (paper, chipboard, fabric) and pass it through the machine by turning the handle and it will come out the other side as a sticker.  Shall we give it a go?

Making Paper Stickers


I cut out some gift wrap paper, put it through the machine and voila ...a sticker.


All I have to do is peel the paper away from the backing sheet and stick it on something.  This was fun, so Little Miss Stylish and I did some more.


This time we made Christmas stickers from Christmas wrapping paper.

Making Fabric Stickers

Next I decided to make some fabric stickers.  You can just cut the fabric up and put it through the machine, but I am hopeless at cutting circles so I thought I'd try and use a paper punch to cut the fabric.  This leads to a funny story, but if you haven't go time then scroll down.


To use a paper punch on fabric, you first need to stiffen the fabric.  I remember using Plaid fabric stiffener years ago, so I headed to Spotlight.  I asked the lady for fabric stiffener, but she had no idea what I was talking about.  She checked with the other staff.  No they don't have fabric stiffener you can brush on, only iron on interfacing.  I tried to explain to her ... you know, I want to stiffen the fabric so I can use a paper punch like Martha Stewart.  I've used it before.  Tonia Todman used to use it.  Well, she looked at me like a 20-something does as if to say 'Who the hell is Tonia Todman?'  Lucky I didn't ask for the prodcut by name, it's called Stiffy, and apparently it's hard to get Stiffy anymore (laughing as I type this).  Anyway, I googled it, and you can use a 50/50 mix of PVA glue and water to replace Stiffy so that's what I did.


Paint it all over the fabric, with baking paper underneath, then hang it on the line to dry.


Well I got about 6 circles cut before my paper punch decided it didn't want to cut any more fabric.  Maybe I needed Stiffy afterall?


I did manage to cut out lots of the smaller shapes and create stickers out of them.


With the left over fabric, I cut out tags, and because they were stiff I was able to punch a hole in the top.

Making Ribbon Stickers

Finally I wanted to try ribbon stickers.  This was easy, I just cut lengths of ribbon and thread them through.  I ran through two at a time to save my sticker cartridge.


So what do you think?  Honestly, for $30 this machine was a whole heap of fun to use.  I can't wait to make some more.

post signature

Wednesday 5 December 2012

Frozen Fruit Sorbet

Being dairy-free, sorbet is my ice-cream, and I just love a fresh frozen fruit sorbet in summer.


Master Recipe for Sorbet
Ingredients:
1  1/2 cups (375ml) fruit juice or pureed fruit
1 cup sugar syrup
1 tablespoon lemon/lime juice (optional), for tartness
1 tablespoon alcohol (optional), see notes
This recipe makes just under 1 litre/1 quart of sorbet and can easily be doubled

Method:
Put your fruit juice/puree in a jug or bowl and taste for natural sweetness.  Add the lemon/lime juice & alcohol if using.  Gradually add sugar syrup to the fruit until you achieve the desired sweetness.  Remember the taste will dull slightly when freezing.  Chill the mixture in the fridge.

When cold, add the mixture to an ice-cream machine and churn until frozen.  Transfer to a container and store in the freezer.


If you do not have an ice-cream maker, place the mixture into a large shallow container, and freeze for 2-3 hours.  Transfer the mixture to a food processor and puree (you do this to add air to the sorbet).  Return the mixture to the container and place back in the freezer.  Freeze until firm.


Using Sugar Syrup
Light Sugar Syrup - 2 parts water to 1 part caster (granulated) sugar
Heavy (Simple) Sugar Syrup - 1 part water to 1 part caster (granulated) sugar.
Light syrups are generally used for poaching fruit, and heavy syrups for making sorbet, but you can choose.

To make sugar syrup, place the sugar and water in a saucepan and stir to dissolve the sugar.  Heat to a gentle boil and simmer for 5 minutes without stirring.  Remove from the heat.  Allow to cool and store covered in the fridge (preferably in glass).


Flavouring Syrups - To flavour the sugar syrup, you can add a vanilla bean, citrus zest, cinnamon sticks, aromatic herbs.  Leave to infuse in the syrup then strain.  You can leave the zest in when making sorbet.

Just Using Sugar
You can also make sorbet by adding sugar directly to the fruit juice. Gently heat just enough fruit juice to cover the sugar until sugar dissolves, then add it to the remaining fruit juice.  David Lebovitz works on a ratio of 1 cup juice to 1/4 cup (50g) caster (granulated) sugar.

A Trio of Sorbets

Here are the fruit bases for the three sorbet's I made.

Mixed berry - 2 cups of mixed frozen berries pureed in the food processor with a couple of tablespoons of sugar syrup to make it more liquid.  Strain the mixture through a sieve to remove the seeds (a conical strainer really helps with this).


Mango & passion fruit - 1 mango (approx 500g/1lb) peeled and chopped then process in a food processor to a puree.  Makes approx 1 cup puree. Add half a cup of passion fruit strained.  It was a little too early for fresh passion fruit when I made this but a 170g/6oz can will give you approx 1/2 cup of juice.


Kiwi fruit - peel & chop 10 kiwi fruit.  Process in a food processor with a little sugar syrup.  Do not over process or the seeds can impart a bitterness.


Sorbet Flavours
This is the best bit.  Once you have the hang of a basic sorbet, you can make it in so many different flavours.

Here are some flavours you can make:

  • Lemon
  • Orange
  • Lime
  • Strawberry
  • Kiwi Fruit
  • Honey Dew melon (nice with a touch of fresh ginger)
  • Raspberry
  • Cantaloupe/Rockmelon
  • Grape (red or white grape juice)
  • Papaya
  • Mango
  • Watermelon
  • Lychee and Ginger
  • Guava
  • Passion fruit
  • Grapefruit
  • Mandarin
  • Peach
  • Apple
  • Rhubarb
  • Blackberry

To save on washing up at Christmas time, why not serve the sorbet in cupcake liners.  I bought these cupcake liners and the Christmas themed toothpicks at the discount shop for only a few dollars.


Notes:
Alcohol does not freeze, so adding a small amount of alcohol to your sorbet will help to keep it soft.  Vodka will perform this task without changing the flavour of the sorbet.  Alternatively you can choose an alcohol that will add flavour.   For example Cointreau in a citrus sorbet, Midori in a melon sorbet, or Marsala in a strawberry sorbet.  Do not use alcohol if children will be eating the sorbet.  Instead, to soften the sorbet just take it out of the freezer 10-15 minutes before you wish to serve it.

You can use honey in place of the sugar syrup.  1 cup sugar syrup is 3/4 cup of honey.  This will affect the flavour and the way the sorbet freezes.

Resources - Heston explains the technical side of sorbet here

Commercially Prepared Sorbets
There are many commercially prepared sorbets available to buy.  Most are fine, just read the labels.
They may contain vegetable gums such as 410 - Locust Bean/carob gum, 412 - Guar gum, and 415 - Xanthin gum, which are used as a thickener or stabiliser (see here), and food acid 330 - Citric acid (see here)


Here's to summer holidays by the pool with refreshing sorbet treats.

That's the last of my OMS Christmas Menu.  Hope you enjoyed it.


post signature

Tuesday 4 December 2012

OMS Christmas Pudding - Low-fat and Dairy-free


When the Overcoming MS team asked me if I could prepare an OMS friendly Christmas menu, the biggest challenge was how to make a Christmas pudding that is low-fat, dairy-free and egg-free.  Here's what I came up with and I've got to say, it's good.  Got the big thumbs up from all my family.


Ingredients:
Dried Fruit Mix - you can use any combination of dried fruit that you like - sultanas, raisins, currants, dates, apricots, figs, prunes, mixed peel, glace cherries or cranberries.  I used 4 and 1/2 cups:
1 cup (150g/5oz) sultanas
3/4 cup (150g/5oz) raisins
1 cup (150g/5oz) currants
1 cup (150g/5oz) dried dates, chopped
3/4 cup (100g/3.5oz) dried apricots, chopped
zest of 1 lemon
1/2 cup orange juice +1/2 cup alcohol (rum, brandy) for soaking the fruit or for a non-alcohol pudding just use 1 cup of orange juice

Wet Ingredients:
1 cup dark brown sugar
2 green apples (125g,4.5oz), unpeeled and grated
1 cup orange juice - juice from 4 oranges, or use good quality juice
2 tablespoons EVOO (extra-virgin olive oil)

Dry Ingredients:
2 cups of self-raising (self-rising) flour
1 teaspoon bi-carbonate of soda (baking soda)
1 cup almond meal
2 teaspoons of mixed spice* (I used 1tsp cinnamon, 1/2 tsp allspice & 1/2 tsp nutmeg)


Method:
Place all the dried fruit, lemon zest and soaking liquid in a glass bowl, cover with clingfilm and leave to soak overnight or for a couple of days stirring regularly.  The fruit should be lovely and plump.  You can heat the mixture in a saucepan first if you like.


When your fruit is ready, grate the 2 green apples and add them to the mixture, together with all the wet ingredients.  Stir well so the sugar dissolves.


Place all the dry ingredients in a bowl and stir/whisk to combine.  Sift the dry ingredients over the top of the fruit mixture.  Gently fold the flour mixture into the fruit until it is combined.

Spoon the pudding mixture into a 2 litre pudding container until it is three-quarters full.  I bought a carbon-steel non-stick pudding bowl with a lid that locks closed, and handles which makes it so much easier.  I did cut a small piece of greaseproof paper to fit in the bottom of the bowl and lightly greased the sides with a little oil.  If you have a pyrex/ceramic bowl you will need to make a water-tight lid and string handle for it.  See instructions here.  You can also make 2 x 1 litre puddings, and freeze one for next year.


Place the pudding bowl into a double steamer, or a large saucepan with a trivet or upturned saucer on the bottom.  This stops the top of the pudding touching the bottom of the pan and burning.  Pour boiling water around the pudding bowl until it comes halfway up the sides.  Put the lid on the saucepan/steamer and simmer for about 4 hours.  You will need to keep an eye on it and top up the water when needed.  Use boiling water from the kettle.


Remove the pudding from the saucepan and leave it to cool in the bowl.  If you want to eat it straight away, leave it to cool for 30 minutes before serving.  Traditionally though, you would now store the pudding in the pantry or fridge for a month to allow the flavours to develop (make a new foil lid and string if you don't have a lidded pudding bowl).  To re-heat the pudding, steam for another hour or so.  Let it cool for 30 minutes and then serve with custard.


Vanilla Custard

2 cups Non-dairy milk - Soy, Almond, Rice, Oat
2-3 heaped tablespoons cornflour
3 tablespoons honey (to taste)
1 vanilla bean split, or 1 tsp vanilla paste/extract

Mix the cornflour with 4 tablespoons of milk until you get a smooth paste.
Heat the rest of the milk and the honey.
Scrape the seeds from the vanilla bean and add both the seeds and pod to the milk.  Continue to heat until it reaches a boil.
Add the cornflour mixture, and simmer gently for 1-2 minutes, then remove from the heat.  Stir through the vanilla extract now if you didn't use a vanilla pod.
To get the yellow colour that egg yolks normally give the custard, soak a couple of strands of saffron in hot water and stir the coloured water through the custard, or add a sprinkle of paprika.  Leave the custard to cool slightly or chill.  Remove the vanilla pod before serving.

Custard Powder Method
Add 2-3 heaped tablespoons of Foster Clark's vanilla custard powder & 1-2 tablespoons honey or sugar to 2 cups of non-dairy milk and cook in the same way as the above recipe.
Ingredients of Foster Clark's custard powder is cornflour, sugar, salt, colour (curcumin, paprika) and natural flavour.

The first 'custard powder' was invented by Alfred Bird in 1837 because his wife was allergic to eggs.  He used cornflour (cornstarch) to thicken milk, rather than eggs. (source)


Christmas Cake
I had a little bit of pudding mixture left over, so I decided to make a mini-Christmas cake out of it.

I baked it in the oven at 150C/300F for about 30-40 minutes.  If you made the whole mixture as a cake, you would probably need to bake it for around 1  1/2 hours.  Use a small skewer to test if the cake is cooked properly.

I think this cake would be delicious with blanched almonds in it.


Notes:
Mixed Spice is a British blend of spices used in fruit cakes and puddings.  It generally consists of cinnamon, nutmeg and allspice with cinnamon being the dominant flavour.  The mix may also include cloves, ginger, coriander, caraway and cayenne pepper (see here)

Traditionally Christmas pudding is made with suet which is raw beef or mutton fat.

This recipe gives a rich dense pudding.  If you want a lighter version, you could reduce the amount of dried fruit.  You can also add some chopped or whole blanched almonds to the dry fruit mixture.


Christmas Pudding History & Tradition

Traditionally in the UK, you start your Christmas pudding on Stir Up Sunday.  This is the name given to the last Sunday before the season of Advent in the Anglican church.  Stir Up Sunday was Sunday November 25th in 2012, and the 24th November 2013.  It is also tradition that every person in the household stirs the Christmas pudding mixture and makes a wish.  Often silver coins, usually a sixpence, were added to the pudding mixture.  If a person's serve of Christmas pudding contained a coin they were able to keep it, and it was thought that this would bring wealth in the coming year.  My grandmother used to add old coins to our pudding but we had to give them back so she could use them again the next year.

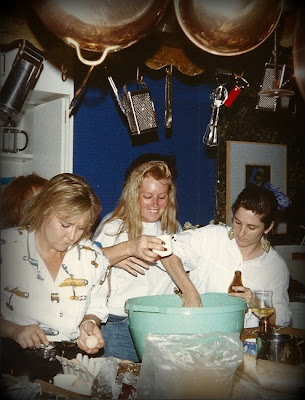
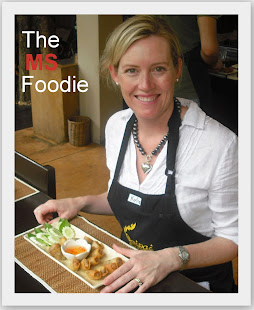
Here's me as an 18 year old at a Christmas pudding party in Dalkeith, Perth.
Look at the size of that bowl!


To serve a Christmas pudding you are supposed to flambe it with brandy, decorate with a sprig of holly and ceremoniously carry it to the table where it would receive a round of applause.  I like the idea of an applause.  I think I'll introduce that tradition in my family.  I'm also going to organise a big Christmas pudding party next year for stir-up Sunday, just to keep the tradition alive.

References - Stir Up Sunday at Wikipedia here, and Christmas pudding history here.


post signature
Related Posts Plugin for WordPress, Blogger...